图像卷积实践
最近对图像识别技术很感兴趣,了解到在这个领域中CNN的应用可以比较有效的解决问题,这里对卷积(convolution)相关的知识进行一下记录说明。
图像卷积是什么?
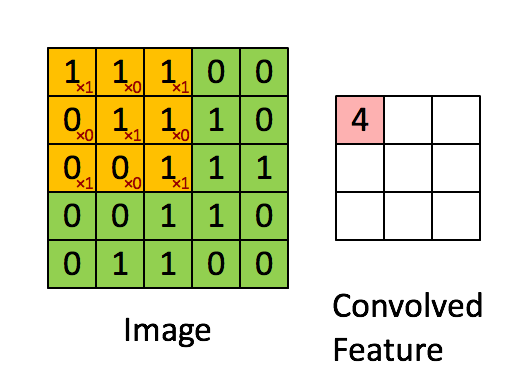
将一张图片看作一张像素的矩阵的话,卷积就是把另一个矩阵(卷积核)在这张图片上移动,在移动的过程中取图片上对应大小的矩阵与卷积核进行运算,每次矩阵运算得出的结果保存成一个新的像素,这个过程就是图像的卷积运算。
卷积的过程可以用下面的示意图展示:

为什么做卷积?
一张原始图像包含了大量的噪音信息,这些噪音信息会干扰后续的运算过程。如果将一张图像看作一个输入信号的话,如果找到一种过滤器将噪音信息过滤掉就可以提高后续运算的准确度。卷积就是这么一个过滤器,这个过滤器的正式称呼是卷积核。
那么这个过滤器可以做些什么呢?其实常见的图像处理软件早已经在使用卷积进行图片处理了,比如图像锐化、模糊、浮雕效果等等…
下面收集了一些常用的过滤器,对这张图片处理后可以看一下效果。

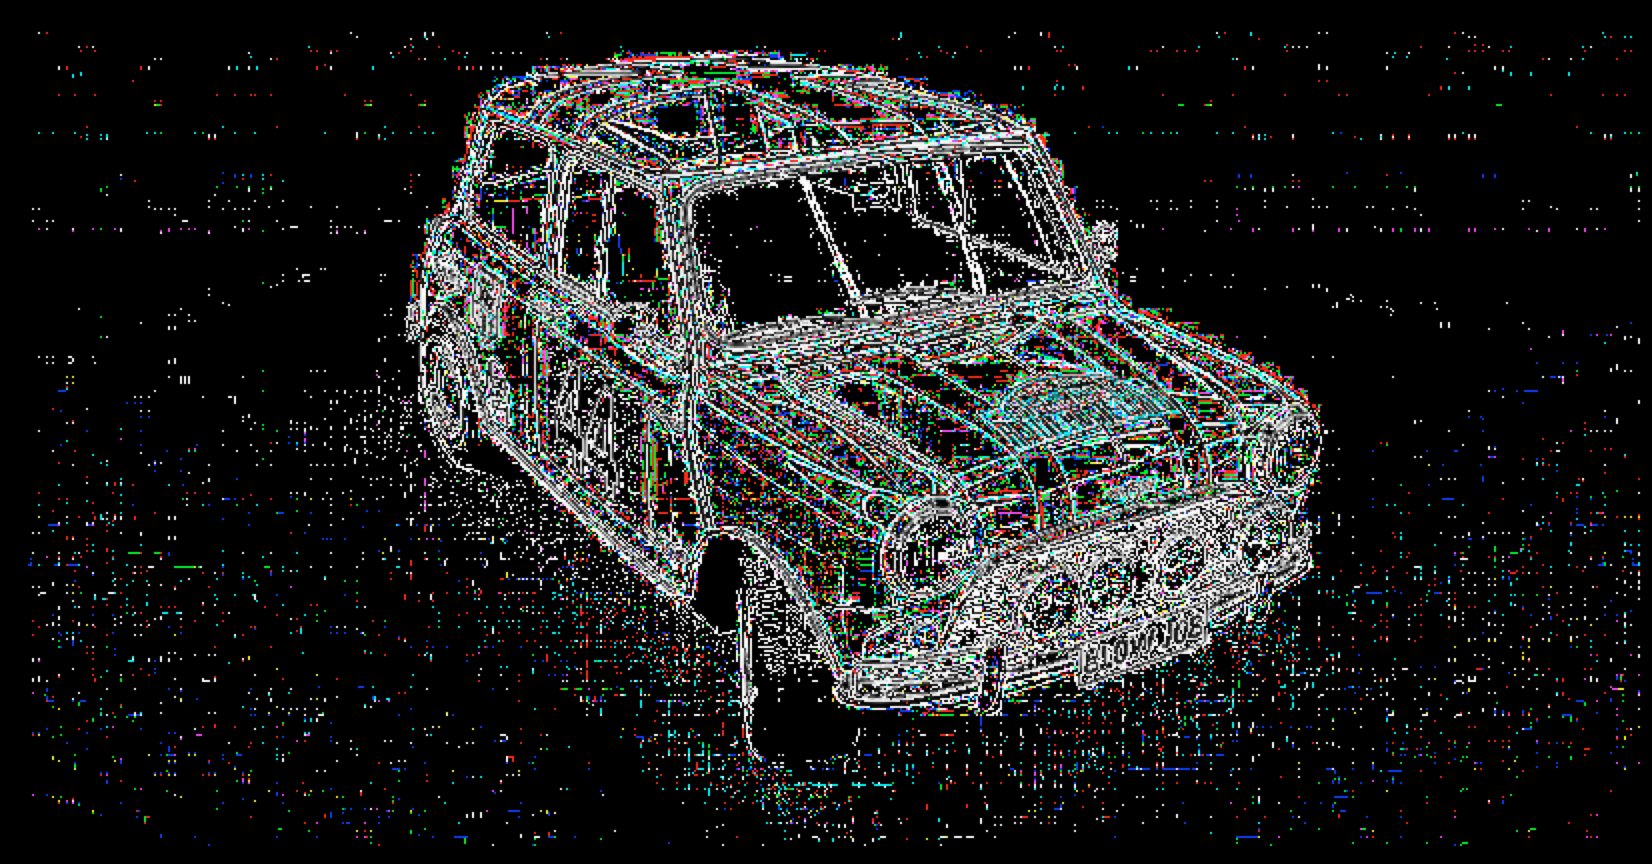
- 图像边界检测
$$
\left[
\begin{matrix}
-1 & -1 & -1 \\
-1 & 8 & -1 \\
-1 & -1 & -1
\end{matrix}
\right]
$$
- 图像模糊
$$
\left[
\begin{matrix}
0 & 1 & 0 \\
1 & 1 & 1 \\
0 & 1 & 0
\end{matrix}
\right]
$$
- 图像锐化
$$
\left[
\begin{matrix}
-1 & -1 & -1 \\
-1 & 9 & -1 \\
-1 & -1 & -1
\end{matrix}
\right]
$$
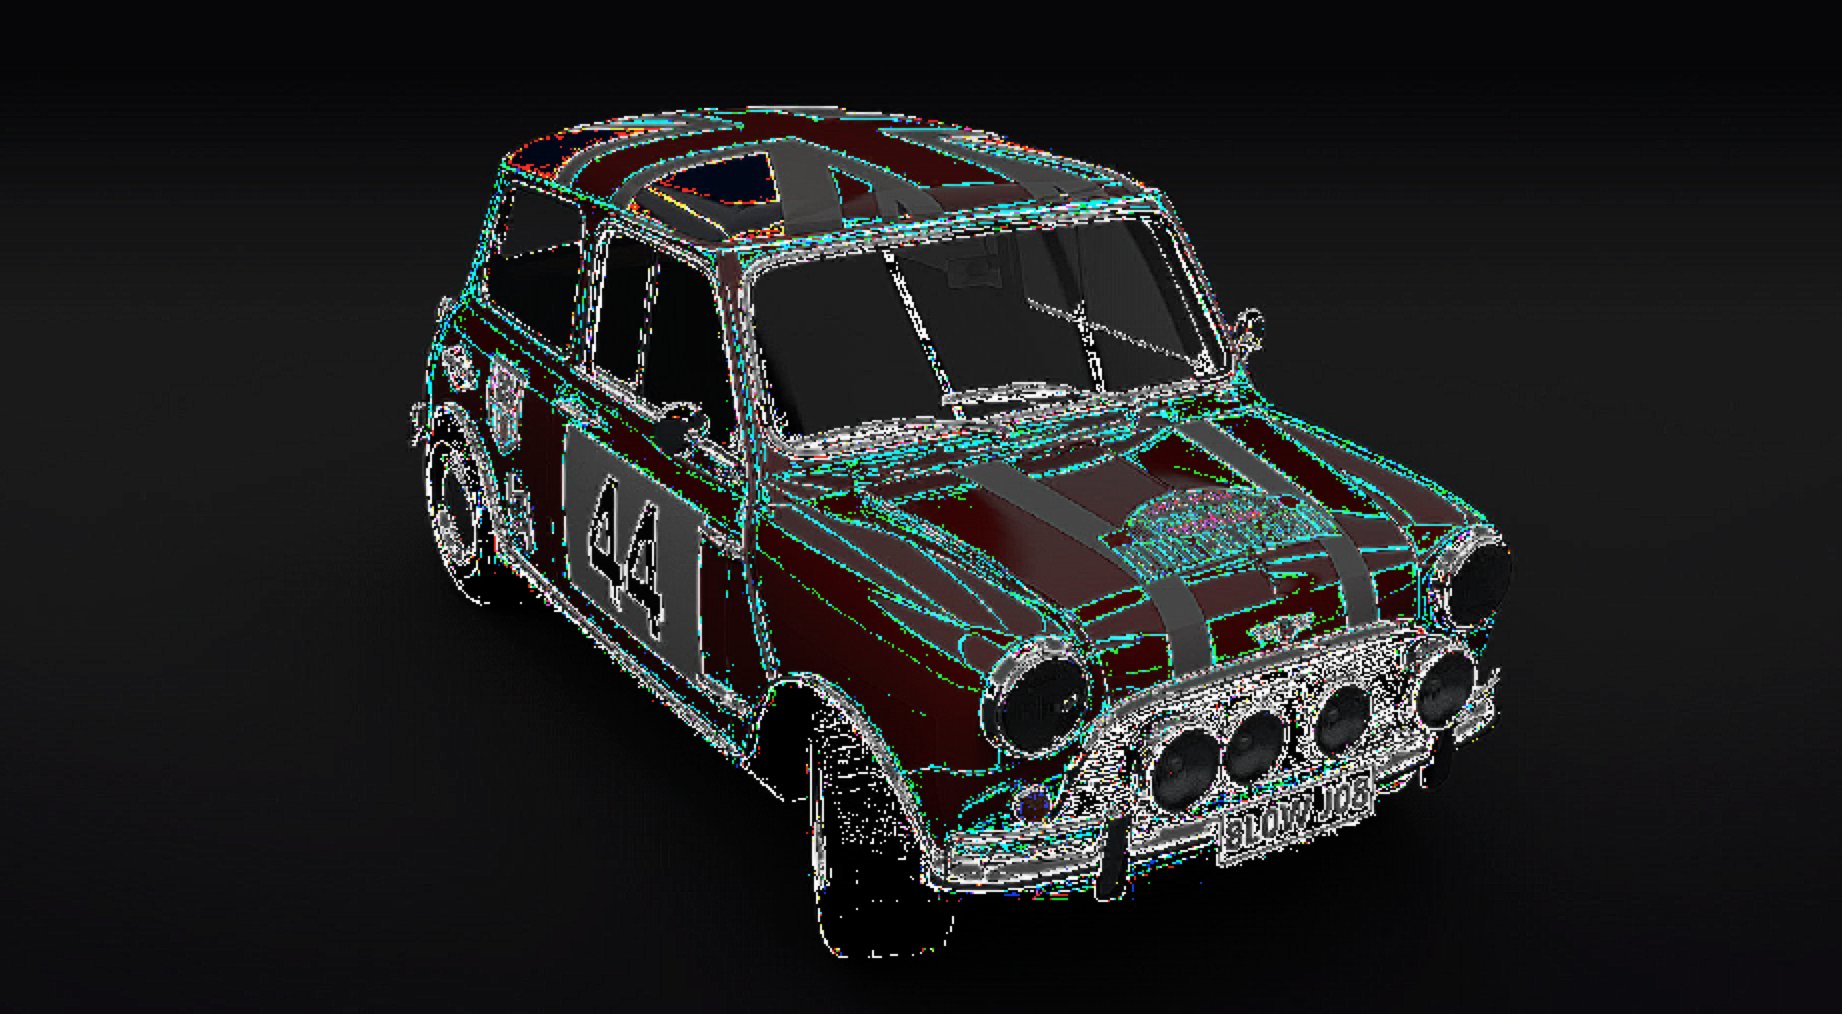
- 浮雕
$$
\left[
\begin{matrix}
-1 & -1 & 0 \\
-1 & 0 & 1 \\
0 & 1 & 1
\end{matrix}
\right]
$$

用numpy进行卷积计算
以上的图片使用下面的算法生成,主要使用了numpy的array进行的计算。通过该算法生成的图片效果还不够理想:
- 比如锐化及浮雕效果,锐化的边缘有些益处而其他部分亮度有些降低
- 浮雕的效果感觉也不够明显
- 程序执行速度有些慢
    def convolution(self, kernel):
        """
        Create a new Image instance by applying the kernel
        """
        print "Run convolution transform"
        print "Start: %s" % time.ctime()

        k_height, k_width = kernel.shape
        n_width = self.width - k_width + 1
        n_height = self.height - k_height + 1

        if self.color_space == COLOR_SPACE_BW:
            new_img_data = np.zeros((n_height, n_width), dtype=self.img.dtype)
            channel_kernel = kernel
        elif self.color_space == COLOR_SPACE_RGB:
            new_img_data = np.zeros((n_height, n_width, 3), dtype=self.img.dtype)
            channel_kernel = np.zeros((k_height, k_width, 3))
            for c in range(3):
                channel_kernel[:,:,c] = kernel
        elif self.color_space == COLOR_SPACE_RGBA:
            # drop the alpha channel
            new_img_data = np.zeros((n_height, n_width, 3), dtype=self.img.dtype)
            channel_kernel = np.zeros((k_height, k_width, 3))
            for c in range(3):
                channel_kernel[:,:,c] = kernel
        else:
            print "Unknow color space"
            return None

        for y in range(n_height):
            for x in range(n_width):
                if self.color_space == COLOR_SPACE_RGBA:
                    new_img_data[y][x] = sum(sum(self.img[y:y+k_height, x:x+k_width,:3]*channel_kernel))
                else:
                    new_img_data[y][x] = sum(sum(self.img[y:y+k_height, x:x+k_width]*channel_kernel))

        imax = np.max(self.img)
        nmax = np.max(new_img_data)
        scale = 1.0*imax/nmax
        print "imax[{0}], nmax[{1}]".format(imax, nmax)
        print "Scale:", scale
        new_img_data = (new_img_data * scale).astype(self.img.dtype)

        print "End: %s" % time.ctime()

        new_image = Image()
        new_image.load_data(new_img_data)

        return new_image
完整的程序可以在GitHub上找到。
